Tuesday, September 12, 2017

Card Making Technique:  Sponging 3

 I made this card using three sponging techniques:

I stamped the leaves in crumb cake, cut them out on the Big Shot, and sponged them first with crushed curry followed by pumpkin pie, Cajun craze, and real red.


I placed a 3 x 3 piece of vanilla card stock on my workspace and then taped the mask over the top.  Using the same four colors, I sponged in circular motions over the mask.


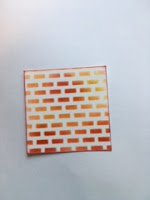
I removed the mask and sponged around the outside edges with real red.


Using the same four colors, I sponged around the edges of the 4 x 5 1/4 vanilla card stock and sponged the edges in real red.  I then stamped the background splatter and the checked pattern.


I finished the card by layering the leaves and tying a Linen Thread bow around the stems, adhering them to the 3 x 3 sponged piece, and mounting that piece to the card with dimensionals.  I used Teeny Tiny Tiny Wishes for the greeting.

Stampin' Up! Products Used:

Inks
Crushed Curry 131173
Pumpkin Pie 126945
Cajun Craze 126965
Real Red 126949
Crumb Cake 126975

Stamp Sets
Vintage Leaves 138802
Teeny Tiny Wishes 127802
Timeless Textures 140517
Touches of Texture 143251

Other
Linen Thread 104199
Classic Punch 141491
Pattern Party Decorative Masks 144103
Sponges 141337
Dimensionals 104430

I hope you have picked up a tip or two in these sponging technique blogs.  Thanks for stopping by!  


Tuesday, September 5, 2017


Card Making Technique:  Sponging 2

One of my favorite stamp sets from the new annual Stampin' Up! catalog is This Little Piggy found on page 48.
I used sponging to create the background.  
 I stamped the pigs in black ink and covered them with masks.  (See my earlier post on masking.)


I started sponging the sun with yellow and then added some orange.  (circular motions on a flat surface--see my earlier post Sponging 1.)
Next I sponged the sky and finished up with the ground.  


The best way to get started with this type of technique is to practice blending different colors on a piece of scrap paper.  (Remember the circular motion!)   Start with a light color and then add  the  darker shades.  It's fun to see the end result!  I hope you will try this technique.  Join me next time for Sponging 3.  
I am always interested in your comments--add them at the bottom of the post.  
Happy Stamping!

Stampin' Up! products used:
Stamp Set: 
This Little Piggy #143922
Inks: 
daffodil delight #126944
pumpkin pie  #126945
marina mist  #126962
soft sky  #131181
garden green #126973
pear pizzazz #131180
crumb cake #126975


Sunday, September 3, 2017


Card Making Technique:  Sponging 1


I often use sponging to add extra depth and richness to my projects.  The greeting on the left has no sponging.  The sponged one the right has more depth and interest.  


I used two sponging methods to create this look. 
1.  Holding the cardstock in one hand, I held the  inked sponge on the side of the paper and gently swiped along the edge of the card stock.


2.  Another way to add color variation and depth to the card is to lay the card stock flat on the work surface, ink up the sponge,  and apply ink in a circular manner to the area you want highlighted.  On the sample above I sponged on two colors working my way from the edge of the card stock to the center.


These techniques are very basic, but add pizazz to a project!  Join me next time--in Sponging 2,  I will combine masking and sponging to create an interesting background color.  


Saturday, August 26, 2017

Stamping Off Technique

Another basic technique that all card makers should know is the stamping off technique.  In "normal" stamping, the crafter inks up the stamp, stamps the image, inks the stamp again, and stamps once more.  (Think to yourself:  Ink it up, stamp.  Ink it up, stamp.) Each stamped image appears as "full strength."

However, in stamping off, the stamp is inked, the image is stamped full strength, and another image is stamped without new ink.  This image is lighter than the first.  (Think to yourself:  Ink it up, stamp, stamp, stamp)

Here is an example:

I inked the bee stamp only the first time.  Each successive bee is a little lighter than the previous.  This gives the appearance of movement as if the bee is flying across the page.

Another use of stamping off is to get several shades of ink from one ink pad.
I inked the pansy stamp only one time. Again each successive stamp is lighter than the previous. Essentially, I have tripled the amount of ink shades I have with this simple technique!


Two step stamping has become very popular and the stamping off technique is used to get varying shades that add dimension and texture to the image.  Here are two stamps used to create one flower:  

                                                                              
The stamp on the left is the detail stamp.  The one on the right is the background stamp.  Use dark ink for the detail and lighter ink for the background.


Here is a card I made using this stamping off technique.  I used one yellow ink pad and one pink ink pad and got all these colors.  I also used the masking technique, making the yellow flower appear slightly behind the dark pink one.  I also used the sponging technique--the topic for my next blog.  

Once again, thanks for stopping by my blog.  Feel free to comment.  Happy Stamping!


Tuesday, August 22, 2017


Hello, Stampers!  I’m back!  The summer has flown by.  We moved to a new house in a neighboring town in early July and spent the rest of the month settling in—and realizing we still have too much “stuff!”  We have the basics in place, but we will be unpacking for months to come!  Our street is named Grand Vista Drive—aptly named for our beautiful view of the nearby Bitterroot Mountains.  A week after the move, a lightning caused forest fire ignited in our mountains and our grand vista has not been so grand.  Six weeks of smoke and haze is getting old.  It is hard to say what the view will be like once the fire is out and our skies have cleared!  We are lucky to be at a safe distance from the actual fire, but many people in the area have been evacuated.  At this point two homes and numerous outbuildings have been destroyed.  We are praying for rain and snow to put an end to it!

Last week we had our grandsons (ages 12 and 10) from the Seattle area with us.  So much fun and activity!  They have returned home to prepare for the upcoming school year, and we are getting used to a quiet house once again!  Bittersweet…..

My craft room is organized, and I am preparing for card making classes next week.  So--it is time I resumed writing my blog!  In the next few posts, I will be writing about some very basic techniques that every card maker should know. 

Today’s technique is called MASKING

The masking technique is used to add dimension to a design.  There are times when you want an image to appear in front of another image.  I am using a pig stamp to show how this is done.


Decide what image you want to appear in the FRONT of the design.  Always stamp the front image first. I wanted two pigs on my cardstock—one standing slightly behind the first.  I stamped the first pig onto a piece of card stock.  I then stamped the same image onto a thin piece of scratch paper.  (Sometimes I use sticky notes instead of scratch paper.  If using a sticky note, stamp the image where the sticky part is on the back.

Cutting slightly inside the lines, I used my paper snips to cut around the scratch paper pig.

 I placed the cut image over the image of the pig on the card stock and used a small piece of washi tape to hold it in place.  (The sticky part of the sticky note works well for keeping the mask in place if you decide to use sticky notes.)


To add the pig's friend, I inked the stamp and stamped over the top of the masked pig on the card stock. 

I removed the mask and “voila”--two pigs--one in front of the other!


I wanted the pigs to be standing in front of a bush.  I needed to mask both pigs this time, so once again I stamped a pig on scratch paper, cut it out, and covered both pigs with a mask, stamped the bush image.


I removed both masks to show this image:
I use this simple technique often.  I hope you have found my information helpful!  I look forward to your comments and suggestions.  I am new to blogging and welcome advice!


Join me next time when I go through the ABC’s of Stamping Off!

Monday, June 19, 2017

Using Card Sketches to Design a Card


Oh, happy day—the UPS guy has delivered my order, I have my new stamp set in hand, and I am ready to make a card!  Now I need a card design.  At this point I have often spent a lot of time working with the card elements trying to come up with a pleasing design, a frustrating effort for me.  Card sketches have saved me!
A card sketch includes three card elements which make card design a simpler task: 
·         Matting—cardstock for the basic card and other contrasting pieces used to mat the basic pieces and make them “pop”
·         Designer paper—pretty paper for accenting the card
·         Embellishments—stamped images, ribbons, sequins, buttons, etc. 
With a sketch in mind, I can get to the fun part more quickly—making the card!  Sketches can be easily found on Pinterest or other websites. 
This sketch is courtesy of an Australian blog group:  just-add-ink. 

I used this sketch in my May class to make these cards.  
At the end of class, I challenged my class to make their own version of the card from the sketch and share it with the rest of us.  Sheila made this card for her granddaughter's (a twin) first birthday.
These three cards are similar in design, but the final versions are all unique.  I hope you have found this post helpful and you look for a card sketch the next time you are frustrated with trying to design a card.

This will be my last blog for a couple of weeks.  We are moving to a new house early July, and I have begun dismantling my craft room.  Thanks for dropping by my blog!

Friday, June 16, 2017

More about the Love Today Planner

Oh, my goodness.....I came across some wonderful tips for setting up a planner today,  and thought I would share the source with you.  I wish I had seen Elizabeth's YouTube videos before I set up mine!!!  Check out this blog:  elizabethscraftroom.co.uk.  Love her ideas!!!!

Thursday, June 15, 2017

Love Today Planner Kit


I was looking for a pretty planner to keep me on schedule and when I saw the Love Today Planner Kit in the new Stampin’ Up! Annual Catalog, I knew I had to order it!  This kit has everything I need to create a customizable yearly planner AND give me a creative outlet too.  No dates are printed, so I was able to start with June.  I can view the whole month in one glance and can add details on the daily planner pages.  The kit includes a beautiful navy and gold binder, monthly divider pages, calendar pages, photo protector pages, page lifter, and accent sticker sheets.  A refill kit is also available.  I am in the process of personalizing each page.  This kit is a perfect blend of memory keeping and day planning.  (I love the pink roses!)

The Tabs for Everything stamp set and the Circle Tab Punch are perfect accessories for the planner.
Circle Tab Punch

Tabs for Everything


Wednesday, June 14, 2017

This is my first post as a blogger!


As a Stampin’ Up! independent demonstrator, I am one of those rare people who love what they do and get to share what they love. And I love stamping!

I’m here to be your creative coach, give you fun project ideas, share special offers, and, of course, teach you about fantastic stamping products. Send me an e-mail or give me a call; I look forward to helping you unleash your creativity!