
Welcome Crafting Friends!
My Stampin Friends and I are beginning another year of blog hops. This month’s theme is LIFE'S SPECIAL OCCASIONS. We are getting a jumpstart on making cards and projects for special occasions we may have this year. If you are following along
the hop, you have arrived from Steph's blog. Be sure to read through my blog, comment below and
continue to Sue's blog. If you get lost along the way, you can find a list of Blog Hoppers at the end of
each Blog. Be sure to check out their creations! Here are the projects I created for this month’s hop:
A Happy Ravioli Day/Anniversary Card


On March 20 my brother and sister-in-law are celebrating their wedding anniversary, their daughter and her husband are celebrating their first anniversary AND it's National Ravioli Day here in the U.S! (Here nearly every day has some little commemoration: National Hot Dog Day, National Pizza Day, etc. LOL). My husband comes from a large Italian family, and they celebrate special occasions with homemade RAVIOLI! Making them is a day long process, but well worth the wait. They are DELICIOUS. The recipe is a well-kept family secret!
A mini photo album--Ravioli Making Day is always a fun occasion, and we take lots of family pictures which will be included in this album.


My hubby makes his own pasta, filling, and sauce.

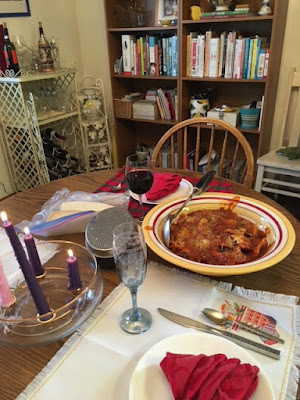
The table is set, and mouths are watering!
YUMMY!
Direction and Dimensions
Card: Basic White cardstock for the base 5 1/2" x 8 1/2" scored at 4 1/4"
Basic Black mat 4 x 5 1/4"
Tag from Tailored Made Tags die set
Random stamping of background from What's Cookin? stamp set*
Accent pieces cut from the Cookin' die set*
Words all in Memento Black ink with A Wish for Everything stamp set
Mini Album:
Album Front Cover: Basic Black 5 1/2" x 8" Score one end at 1/2"
Album Back: Basic Black 5 3/8" x 7 7/8" (The back is slightly smaller than the front, so it won't be visible when the album is closed.) Score one end at 1/2".
Real Red mat: 7 1/4 x 5 1/4"
Basic Black mat: 5" x 4 1/2"
Basic White focal piece: I typed this on my computer and cut it to 4 3/4" x
4 1/4"
Clear Envelopes (photo holders): 6-10 clear envelopes (Available from Stampin' Up! Find the link to my online store below.)
Basic White Envelope Cover: 4 3/4 x 2" scored at 1"
Instructions:
1. Prep the score lines of the cover pieces. (I put a sticky note on each, so I would know which is the top cover.) Apply a strip of tear and stick adhesive along the flap of the top cover piece.

2. Overlap the 1/2" flaps and adhere them together. (The top flap should cover up the back flap.)
3. Center the red mat and adhere it to the front cover.
4. Decorate and/or stamp the focal piece and adhere it to the black mat.
5. For the clear envelope piece, peel the plastic strip off the clear envelope to expose the glue.
6. Center and adhere it inside the envelope cover. (The top of the clear envelope flap should be flush with the score line of the envelope cover.)

7. Continue adhering the clear envelopes one after the other on top of the first one. Keep them lined up with the first one.

8. Add tear and stick tape to the inside of the of the envelope end cover as shown in the picture above. Then close and secure it on top of the stack of clear envelopes.
9. Punch holes through all layers. Insert twine or ribbon and tie a bow.
10. Put tear and stick tape on the back of the envelope cover, and then adhere it to the back of the back cover piece. (Flush to the edge of the glued flap.)

This mini album is so versatile. The size can easily be adjusted. It can be made in any color card and decorated to suit any occasion. It can be a mini scrapbook to highlight a specific event (a high school activity, First Communion, 50th wedding anniversary, a birthday party, the list is endless!) It would make a perfect little gift for grandparents filled with pictures of the grandchildren. Give it a try!
Thanks for stopping by and having a look at my creations. I'd love for you to leave a comment to let me know what you think. For more crafting inspiration, click on the links below.
 | ||
 |  | |
 |  |


Very nice - that ravioli looks like a lot of work. I've see similar photo albums but haven't made in a long time - thank you for the great reminder and instructions.
ReplyDeleteThanks, Maureen.
DeleteVery clever!
ReplyDeleteThank you, Barb!
DeleteGreat way to make an album. I've made my own Ravioli in the past too - nothing compares to homemade pasta!
ReplyDeleteThanks, Sue
DeleteAwesome projects Jean! Love the mini album idea!
ReplyDeleteThank you, Teri
DeleteMmmmm....Raviloi!
ReplyDeleteHis are the best!
DeleteWhat fun projects, who knew there was such a thing, looks delicious!
ReplyDeleteThanks, Jo!
DeleteThis truly is a delicious project!!! I love how you made the little album!! Everything came out so great!!!!
ReplyDeleteThanks, Steph!
ReplyDeleteLove how you incorporated their anniversary with the day celebration. Great card and album, now to the more important stuff...any recipes I can borrow, lol, I'm drooling.
ReplyDeleteSorry--top secret recipe. LOL
ReplyDeleteThanks for your comments!
DOH! lol
Delete