
Welcome, Crafting Friends!
It's time for my Stampin' Friends and I to share our latest cards and 3-D projects. Our theme this month is: Just Rewind & Redo. We are looking back to past projects and techniques, remaking those favorite projects, and giving them a fun update using new products. If you are following our blog hop, you may have come from Jo's blog. For more inspiration I hope you will continue on to Katja's blog. A list of bloggers and their links are found at the end of my blog. We appreciate comments posted at the end of each person's blog. Thanks!

This is the card I made for this month's blog:

I used Pansy Petals designer series paper for the background and used other In Colors for the banners and flower "button." Each banner has two layers. The underlayer is from the In Colors DSP set and the top layer is some some shimmery vellum. I offset the layers to show a bit of the underlayer. The photo below gives an idea of its pretty shimmer.

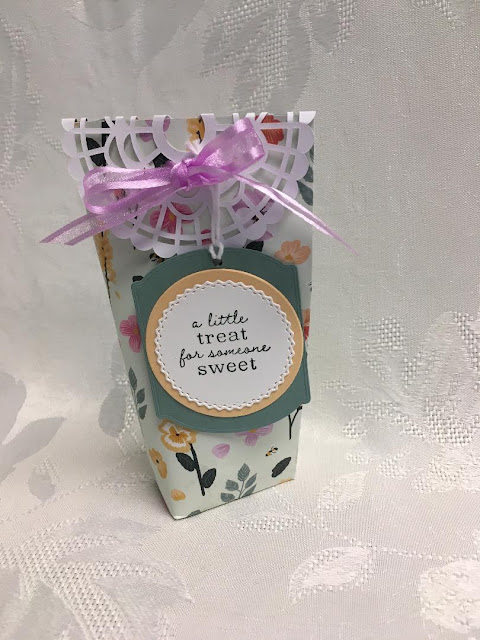
My simple 3-D project is one I made after watching a YouTube video made by Caroline Helwigh Wright a former demonstrator in the UK. I usually give a little chocolate treat to my class attendees, and this is a quick and easy treat bag to make using a 6 x 6" piece of pretty paper. Here is the link to watch Caroline make the bag: (532) Ombre Gift Pouches - Video Tutorial with Colourful Seasons DSP - Stampin' UP New Catalogue Week - YouTube

Sometimes I have trouble with card design, so I often turn to Pinterest for Card Sketches. The sweet sketch below is one of the very first one I pinned. I used it for one of the first classes I held after becoming a Stampin' Up! demonstrator five years ago. It's still one I use often! The attendees at that class were beginners at stamping. They had such great success with this simple card, they were eager to come to another class. Some of them are still stamping with me!
This is the card I made for this month's blog:
Rather than use a button for the twine embellishment, I cut a flower using the Pierced Bloom Dies and punched two holes for the twine. I love the look of the pierced flower!
The doily and the stamp set I used for the greeting are no longer available from Stampin' Up, but the rest of the products can be found in the list at the bottom of my blog.
Here is the template I used to make the bag. (I used some scratch paper, so it's a little messy, but you get the idea....)
1. Score at 1 inch. This is the bottom of the bag, so if you are using paper with a directional pattern, you will need to position it properly.
2. Turn the paper and score at 1-3/4", 2-3/4 ", 4-1/2" stopping at the 1" score line.
3. Score at 5-1/2" all the way down the side.
4. Cut away the shade area.
5. Keeping the paper slightly rolled, adhere the tab to the other side.
6. To make the bottom of the bag, cut on the short score lines to the 1" score line. Fold the side flaps in first. Fold the other flaps in, apply adhesive to the last flap.
7. Decorate as you wish.
Below are the names of my stampin friends. Click on each name to go to her blog.
1.. Kim Lamos -
2. Jo Blackman -
3. Jean Beaulieu - You are here.
4. Katja Ettig -
5. Heidi Collins -
6. Teri Pocock -
9. Steph Jandrow -
Here are the current products I used in my card and project. If you would like to shop with me, simply click on the item. You will automatically be linked to my online "store."
Product List
 | ||||
 |  |  |
 Designer Series Paper")
 Designer Series Paper")


Thanks so much for stopping by. Have a wonderful rest of July, and I hope to see you next month!
Jean


Lovely projects
ReplyDeleteI used card sketches a lot too
Thank you, Steph.
DeleteSuch gorgeous projects Jean! That vellum is just beautiful!
ReplyDeleteThank you so much!
DeleteGorgeous projects, really pretty x
ReplyDeleteThank you!
ReplyDeleteI really love that vellum! Such pretty details on your projects!
ReplyDeleteThank you so much!
DeleteCute projects. The shimmery vellum is awesome.
ReplyDeleteThanks, Kim.
ReplyDeleteIn the past I found card sketches intimidating, but now I love them! Great card and pouch! I have a ton of 6x6 DSP that will not get used up.
ReplyDeleteThanks so much. The pouch can be made different lengths too.
ReplyDelete