Tuesday, September 12, 2017

Card Making Technique:  Sponging 3

 I made this card using three sponging techniques:

I stamped the leaves in crumb cake, cut them out on the Big Shot, and sponged them first with crushed curry followed by pumpkin pie, Cajun craze, and real red.


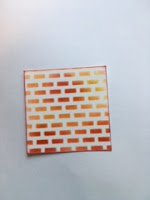
I placed a 3 x 3 piece of vanilla card stock on my workspace and then taped the mask over the top.  Using the same four colors, I sponged in circular motions over the mask.


I removed the mask and sponged around the outside edges with real red.


Using the same four colors, I sponged around the edges of the 4 x 5 1/4 vanilla card stock and sponged the edges in real red.  I then stamped the background splatter and the checked pattern.


I finished the card by layering the leaves and tying a Linen Thread bow around the stems, adhering them to the 3 x 3 sponged piece, and mounting that piece to the card with dimensionals.  I used Teeny Tiny Tiny Wishes for the greeting.

Stampin' Up! Products Used:

Inks
Crushed Curry 131173
Pumpkin Pie 126945
Cajun Craze 126965
Real Red 126949
Crumb Cake 126975

Stamp Sets
Vintage Leaves 138802
Teeny Tiny Wishes 127802
Timeless Textures 140517
Touches of Texture 143251

Other
Linen Thread 104199
Classic Punch 141491
Pattern Party Decorative Masks 144103
Sponges 141337
Dimensionals 104430

I hope you have picked up a tip or two in these sponging technique blogs.  Thanks for stopping by!  


Tuesday, September 5, 2017


Card Making Technique:  Sponging 2

One of my favorite stamp sets from the new annual Stampin' Up! catalog is This Little Piggy found on page 48.
I used sponging to create the background.  
 I stamped the pigs in black ink and covered them with masks.  (See my earlier post on masking.)


I started sponging the sun with yellow and then added some orange.  (circular motions on a flat surface--see my earlier post Sponging 1.)
Next I sponged the sky and finished up with the ground.  


The best way to get started with this type of technique is to practice blending different colors on a piece of scrap paper.  (Remember the circular motion!)   Start with a light color and then add  the  darker shades.  It's fun to see the end result!  I hope you will try this technique.  Join me next time for Sponging 3.  
I am always interested in your comments--add them at the bottom of the post.  
Happy Stamping!

Stampin' Up! products used:
Stamp Set: 
This Little Piggy #143922
Inks: 
daffodil delight #126944
pumpkin pie  #126945
marina mist  #126962
soft sky  #131181
garden green #126973
pear pizzazz #131180
crumb cake #126975


Sunday, September 3, 2017


Card Making Technique:  Sponging 1


I often use sponging to add extra depth and richness to my projects.  The greeting on the left has no sponging.  The sponged one the right has more depth and interest.  


I used two sponging methods to create this look. 
1.  Holding the cardstock in one hand, I held the  inked sponge on the side of the paper and gently swiped along the edge of the card stock.


2.  Another way to add color variation and depth to the card is to lay the card stock flat on the work surface, ink up the sponge,  and apply ink in a circular manner to the area you want highlighted.  On the sample above I sponged on two colors working my way from the edge of the card stock to the center.


These techniques are very basic, but add pizazz to a project!  Join me next time--in Sponging 2,  I will combine masking and sponging to create an interesting background color.